In this article we will give an overview of Minikube and Helm.
If you are new to Kubernetes, it may be helpful to read section Basics Concepts of Kubernetes to familiarize yourself.
Minikube offers the possibility to run Kubernetes locally. In this tutorial we will install minikube and integrate Helm.
Helm is a package manager for Kubernetes (minikube). We can compare it with apt for Ubuntu, yum for Centos and Homebrew for macOS.
Basics Concepts
My definitions are not trying to explain the technology in depth. It’s only giving you an understanding of the basic concepts of Kubernetes.
- Container – In Minikube, containers are used as the building blocks of creating applications.
- Pod – Pod is a collection of one or more containers that share storage and network resources. Pods contain the definition of how the containers should be run in Minikube. Minikube uses these definitions to maintain the necessary resources. For example, you can define you need two pods. During execution, if a pod goes down, Minikube will automatically fire up a new pod.
- Service – Because pods are replaceable, Minikube needs an abstraction layer to keep the interaction between the different pods seamless. For example, if a pod dies and a new pod is created, the application users shouldn’t get bogged down in the details of network addresses and related issues. Services are wrappers around the pods to create levels of abstraction.
- Master – Master coordinates the cluster. It’s like the brains of the operation.
- Node – Workers who run the pods.
- kubectl – It’s the command line interface for running commands on Kubernetes cluster.
Kubernetes Architecture

Install minikube:
First we need to install VirtualBox. This will offer us a free and open-source hypervisor which can be used to virtualize our minikube environment.
Download VirtualBox from here and install: https://www.virtualbox.org/wiki/Downloads
Start minikube and use VirtualBox as VM driver. This will create a local one-node Kubernetes cluster in VirtualBox. This step can take some time.
For Linux:
$ curl https://raw.githubusercontent.com/kubernetes/helm/master/scripts/get > get_helm.shchmod 700 get_helm.sh./get_helm.shFor MacOs:
$ minikube start — vm-driver=virtualbox
# or
$ minikube start --memory 2048 --cpus 2 --vm-driver virtualbox
Minikube starts with some sane default VM configs for any modern machine.
DefaultMemory       = 2048
DefaultCPUS         = 2
DefaultDiskSize     = "20g"
MinimumDiskSizeMB   = 2000
DefaultVMDriver     = "virtualbox"
You can pass more memory during minikube start with the --memory flag. Note that you'll need to stop/start minikube for this to take effect. or to set as default you can do something like this and restart Minikube : minikube config set memory <memory>, and for CPU minikube config set cpu <cpu>,

As you see my minikube instance is started in VirtualBox.

You can use different vm drivers to manage the VM. Hyperkit seems to be a more reliable hypervisor. It is designed to be interfaced with higher-level components. HyperKit currently only supports macOS using the Hypervisor.framework. It is a core component of Docker For Mac.

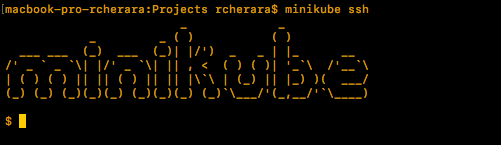
To log into the VM minikub run command :
$ minikube ssh
# Checking the status.
$ minikube status

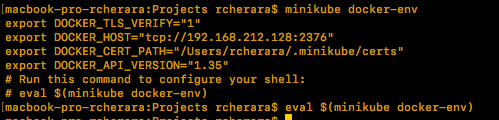
To be able to work with the docker daemon on your mac/linux host use the docker-env command in your shell, you can get it running
$ minikube docker-env
$ eval $(minikube docker-env)
To manage minikube we can use kubectl. It is a CLI for running commands against Kubernetes clusters. To install kubectl on MacOS brew and For other platform see : https://kubernetes.io/docs/tasks/tools/install-kubectl/
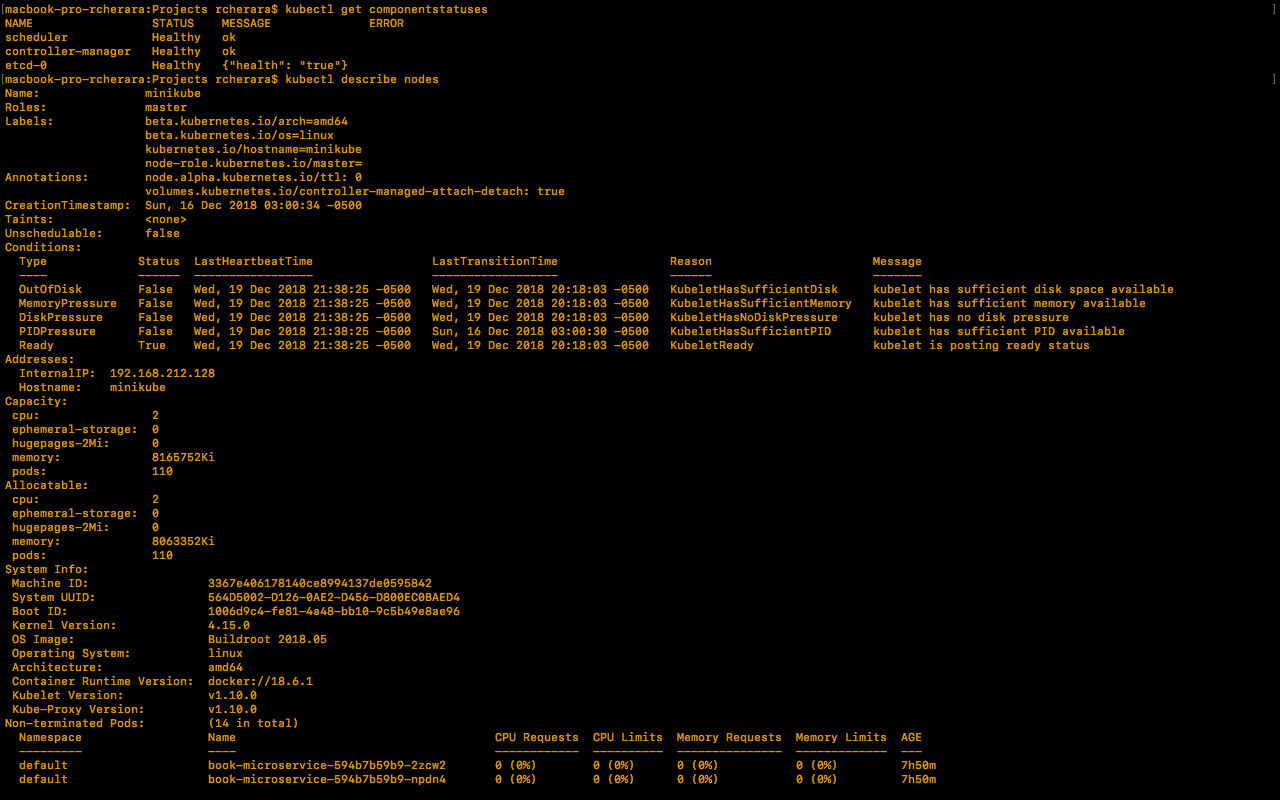
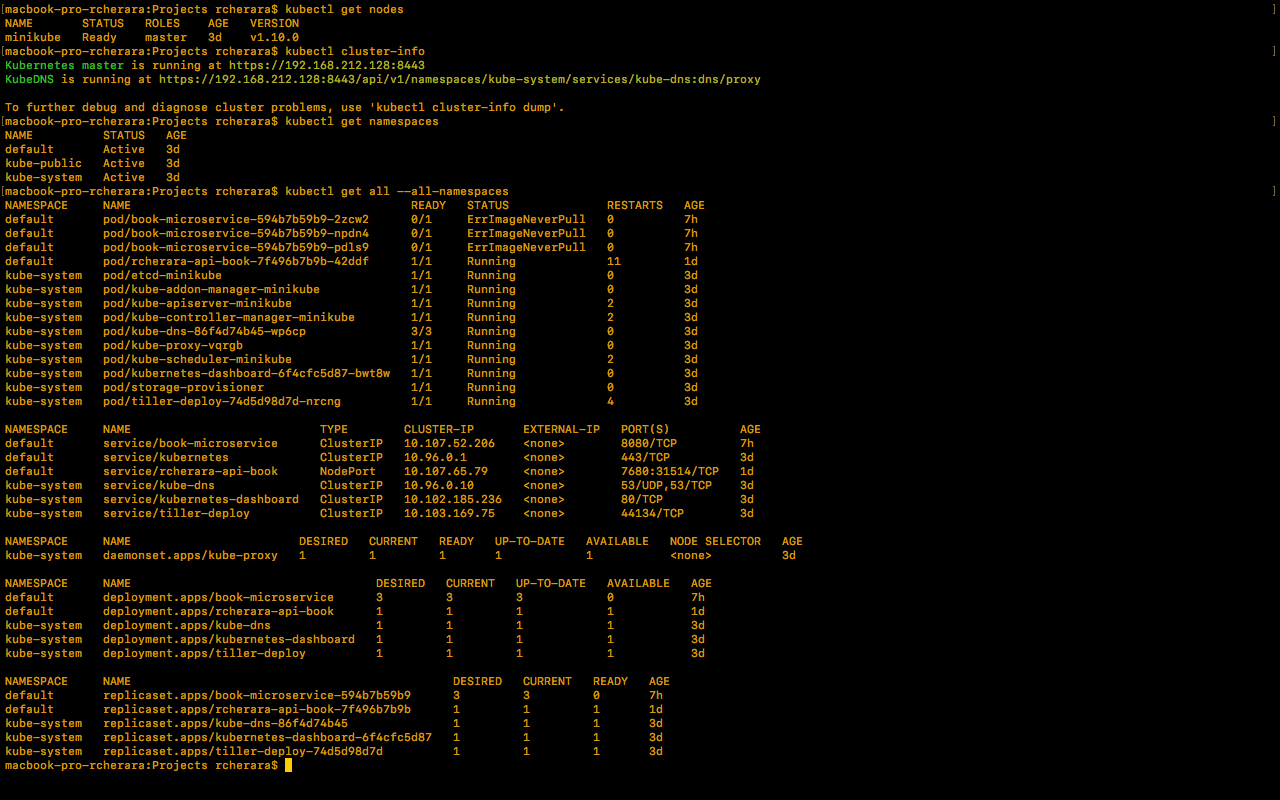
$ brew install kubectlA good way to verify that our cluster minikube is generally healthy.
$ kubectl get componentstatuses

$ kubectl describe nodes
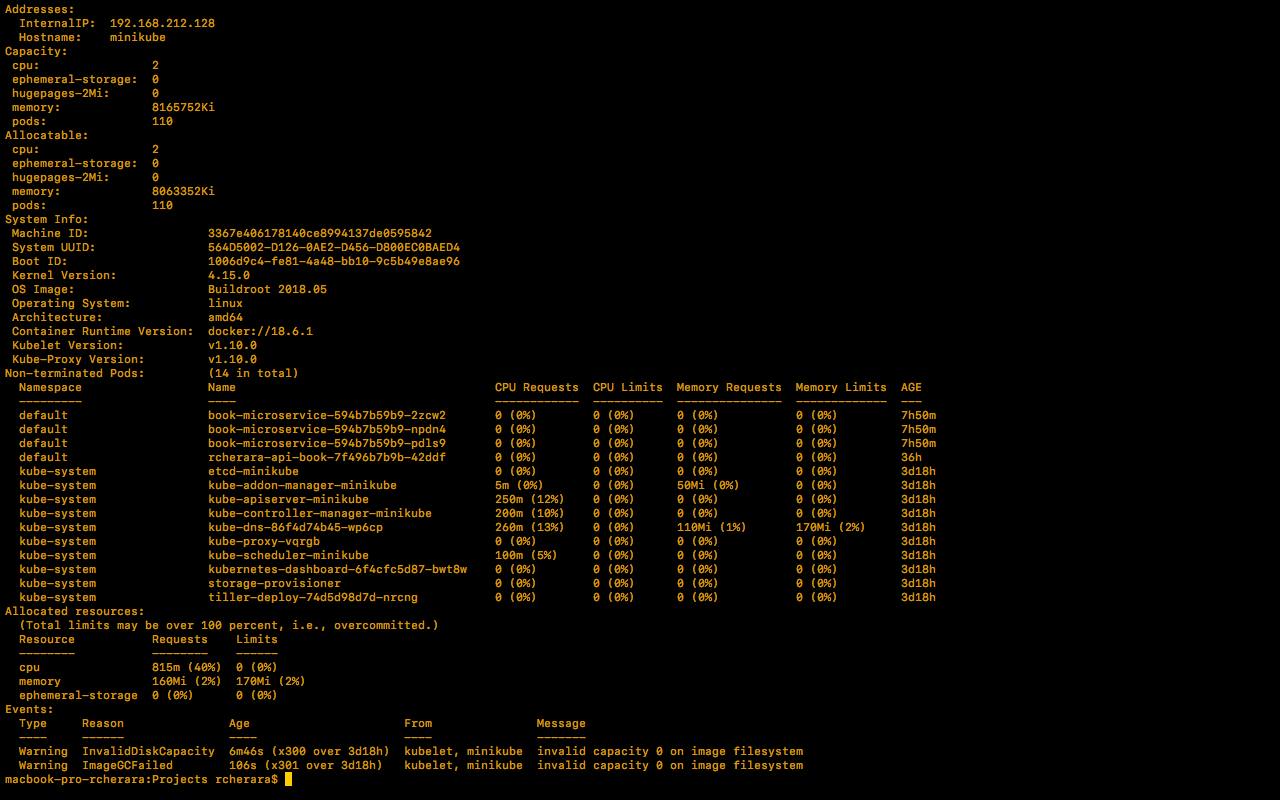
# the details of the kubernetes components.
$ kubectl get nodes
$ kubectl cluster-info
# Verify Namespaces (default, kube-public, kube-system)
$ kubectl get namespaces
# Verify all the resources (ds, deploy, rs, po, svc) in all the namespaces.
$ kubectl get all --all-namespaces
# confirm the kubectl context, if it is minikube?
$ kubectl config current-context

Install, Configure, and Deploy NGINX on a Kubernetes Cluster Minikube
Deployment of nginx
kubectl create deployment nginx --image=nginx
kubectl create service nodeport nginx --tcp=80:80
Running a nginx container and expose with nodePort
At the deployment, we didn’t mention the number of instances for our service. So we just had one Pod that was provisioned on the single node. But, in this exemple we deploy and scale to 3 instances.
# Deployment of nginx on 3 pods by Running a Container
kubectl run my-nginx-nodePort --image=nginx --port=80
kubectl expose deployment my-nginx --type=NodePort
Kubectl scale --replicas=3 deployment/my-nginx-nodePort
# delete the deployement and the created service
kubectl delete deployment my-nginx-nodePort
kubectl delete svc my-nginx-nodePort
Running a Container and expose with LoadBalancer
$ kubectl run my-nginx-lb --image=nginx --replicas=2 --port=80 --expose --service-overrides='{ "spec": { "type": "LoadBalancer" } }'
If you want to get the URL of the service, add the –url=true to the above command. See the output below.
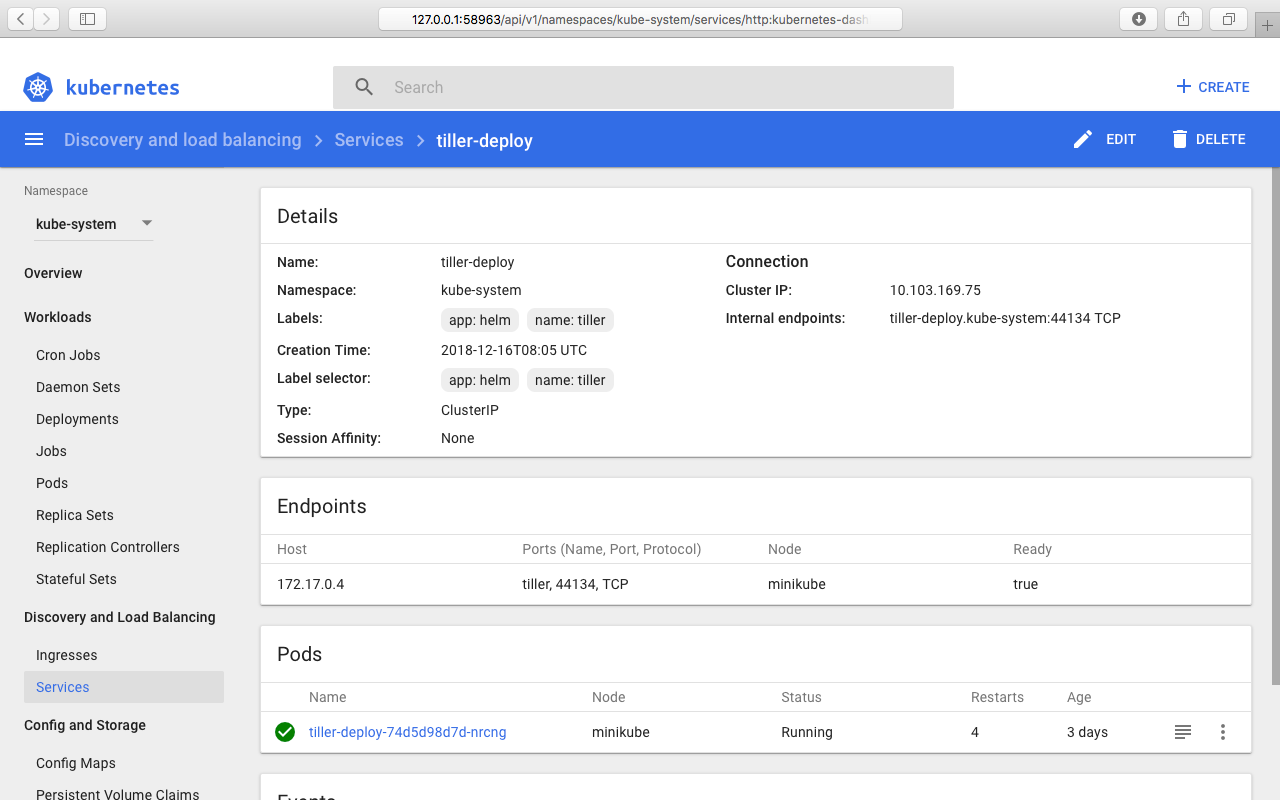
Web UI (Dashboard)
Dashboard is a web-based Minikube ( and Kubernetes too ) user interface. You can use Dashboard to deploy containerized applications to a minikube cluster, troubleshoot your containerized application, and manage the cluster resources.
To access the Minikube Dashboard, lets run this command.:
$ minikube dashboard
http://127.0.0.1:62579/api/v1/namespaces/kube-system/services/http:kubernetes-dashboard:/proxy/

Helm the Kubernetes Package Manager
Helm is a package manager for Kubernetes that allows developers and operators to more easily package, configure, and deploy applications and services into Kubernetes clusters ( Minikube too). Helm is a tool for managing Kubernetes packages called charts.
Helm can:
- Install software.
- Automatically install software dependencies.
- Upgrade software.
- Configure software deployments.
- Fetch software packages from repositories.
Charts are Helm packages that contain at least two things:
- A description of the package (
Chart.yaml) - One or more templates, which contain Kubernetes manifest files
Charts can be stored on disk, or fetched from remote chart repositories (like Linux packages).
For Helm, there are three important concepts:
- The chart is a bundle of information necessary to create an instance of a Kubernetes application.
- The config contains configuration information that can be merged into a packaged chart to create a releasable object.
- A release is a running instance of a chart, combined with a specific config.
There are two parts to Helm:
The Helm client (Helm) and the Helm server (Tiller). This article shows how to install and use the client. The Helm client is written in the Go programming language, and uses the gRPC protocol suite to interact with the Tiller server. The Tiller server is also written in Go. It provides a gRPC server to connect with the client, and it uses the Kubernetes client library to communicate with Kubernetes. Currently, that library uses REST+JSON.

The Tiller server stores information in ConfigMaps located inside of Kubernetes. It does not need its own database.
To use our Helm package manager we need to install it first:
# For MacOs
$ brew install kubernetes-helm
# For Linux
$ sudo snap install helm --classic
# For Windows with Chocolatey the package manager
$ choco install kubernetes-helm
Using the search command without arguments lets us fetch all the available packages.
$ helm searchTo begin working with Helm, run the ‘helm init’ command:
$ helm initThis command installs Tiller into the cluster in the kube-system namespace and without any role-based access control (RBAC) rules applied. This is appropriate for our case local development because it enables you to be productive immediately. As you see the service tiller is running on my Kubernetes cluster Minikube, listens for commands from helm, and handles the configuration and deployment of software releases on the cluster.
Helm commands :
Repo Commands
  repo        add, list, or remove chart repositories
  search      search for a keyword in charts
  update      update information on available charts in the chart repositories

Local Commands:
  home        displays the location of HELM_HOME
  serve       start a local http web server
  version     print the client version information

Release Commands:
  delete      given a release name, delete the release from Kubernetes
  get         download a named release
  install     install a chart archive
  list        list releases
  upgrade     upgrade a release
  status      displays the status of the named release
  rollback    roll back a release to the previous version

Cluster Commands:
  init        initialize Helm on both client and server

Chart Commands:
  create      create a new chart with the given name
  inspect     inspect a chart
  fetch       download a chart from a repository and (optionally) unpack it in local directory
  lint        examines a chart for possible issues
  package     package a chart directory into a chart archive
  verify      verify that a chart at the given path has been signed and is valid
Install some examples chart
- spring-cloud-data-flow : Toolkit for building data processing pipelines.
- stable/gitlab-ce : GitLab Community Edition
- testlink : Web-based test management system
- sonarqube : Sonarqube is an open sourced code quality scanning tool
- locust : A modern load testing framework
- sonatype-nexus : Sonatype Nexus is an open source repository manager
- gocd : GoCD is an open-source continuous delivery server
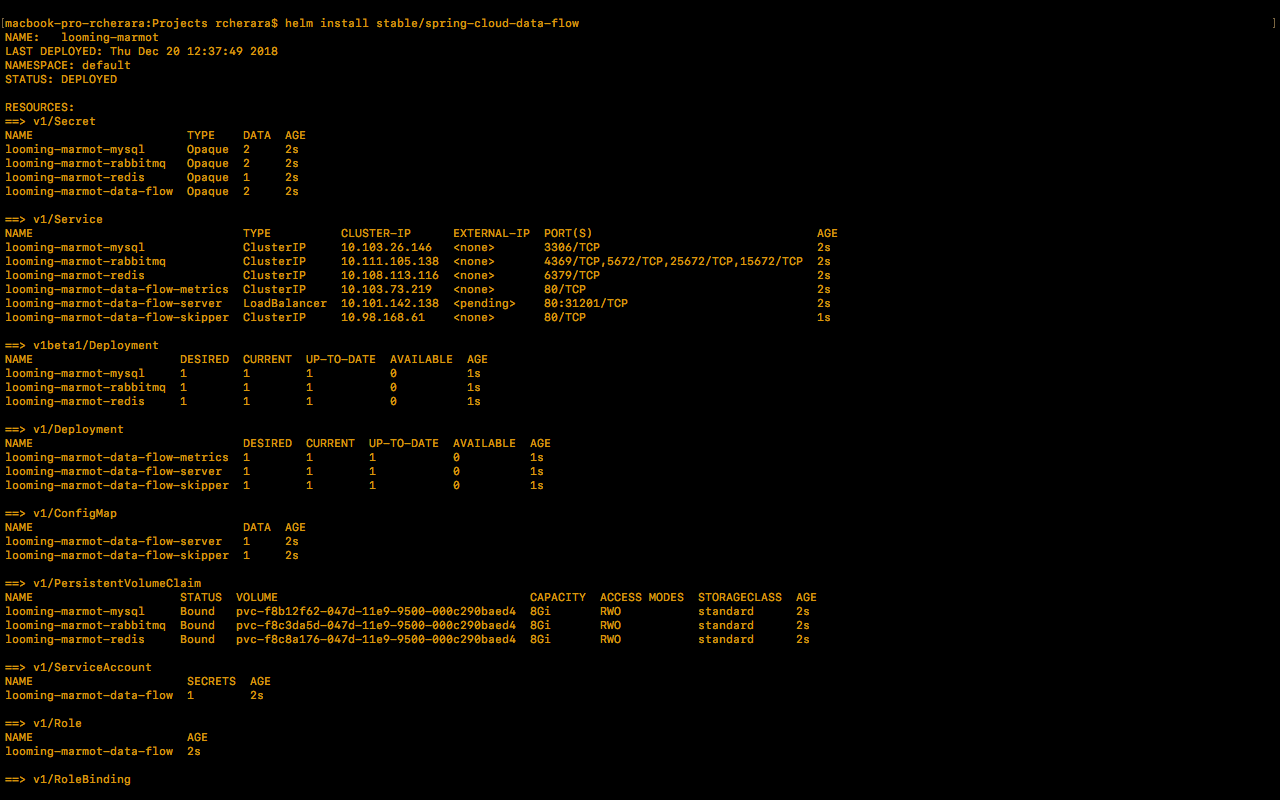
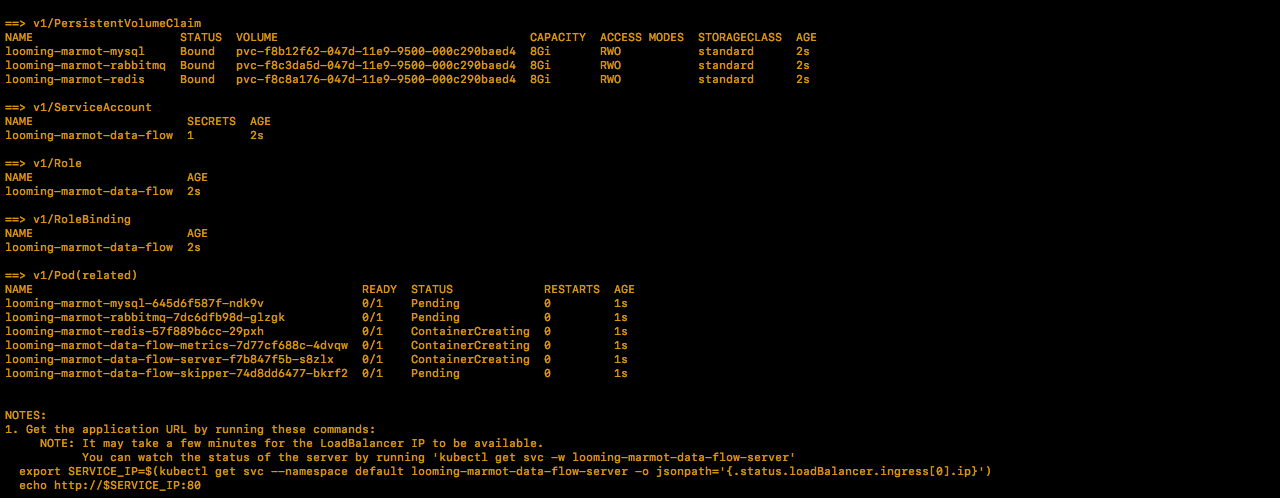
- spring-cloud-data-flow
Let’s install the spring-cloud-data-flow package, Helm display informations about the package installed.
$ helm install stable/spring-cloud-data-flow
- gitlab-ce
Let’s install the gitlab-ce package, Helm display informations about the package installed.
$ helm install stable/gitlab-ce
To work gitlab-ce good as indicate in this link, we need at least 4 GB of RAM available on your cluster. 41GB of storage and 2 CPU are also required.
To see what packages are installed run this command:
$ helm ls

- testlink
$ helm install stable/testlink
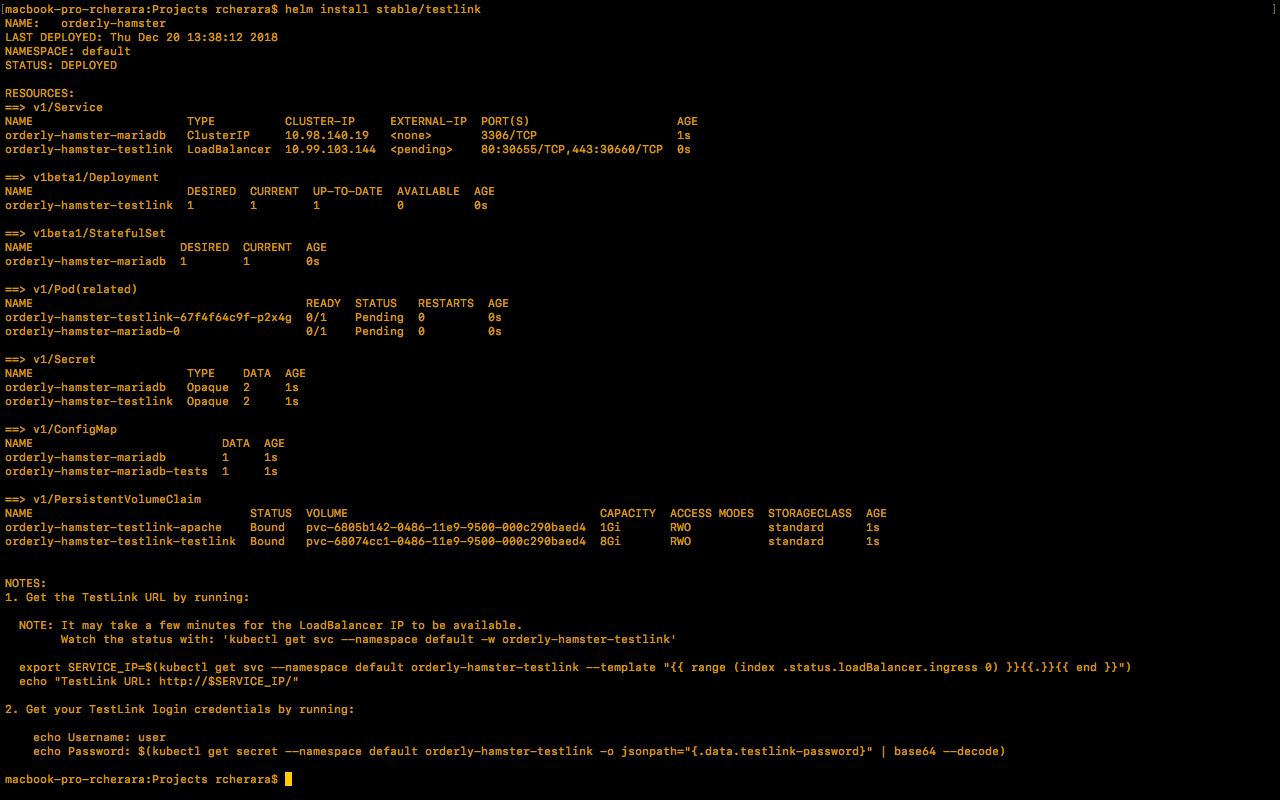
Username: user
Password: OZ6GP4FYIi
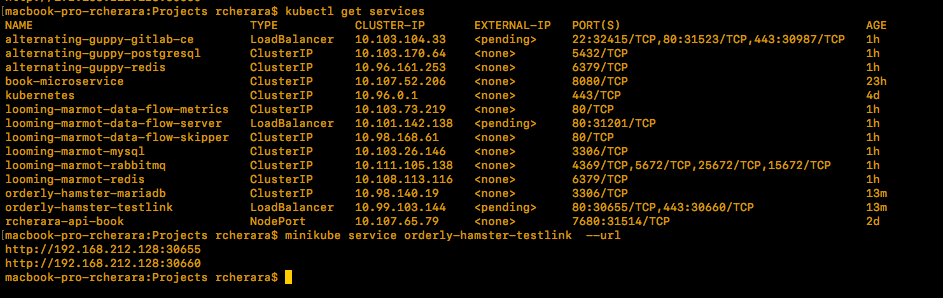
# Run the following command to get the IP Address for the testlink Service:
$ kubectl get services
$ minikube service mangy-badger-jenkins --url
- sonarqube
Let’s install the sonarqube package, Helm display informations about the package installed.
$ helm install stable/sonarqube

- locust
Let’s install the locust package, Helm display informations about the package installed.
$ helm install stable/locust
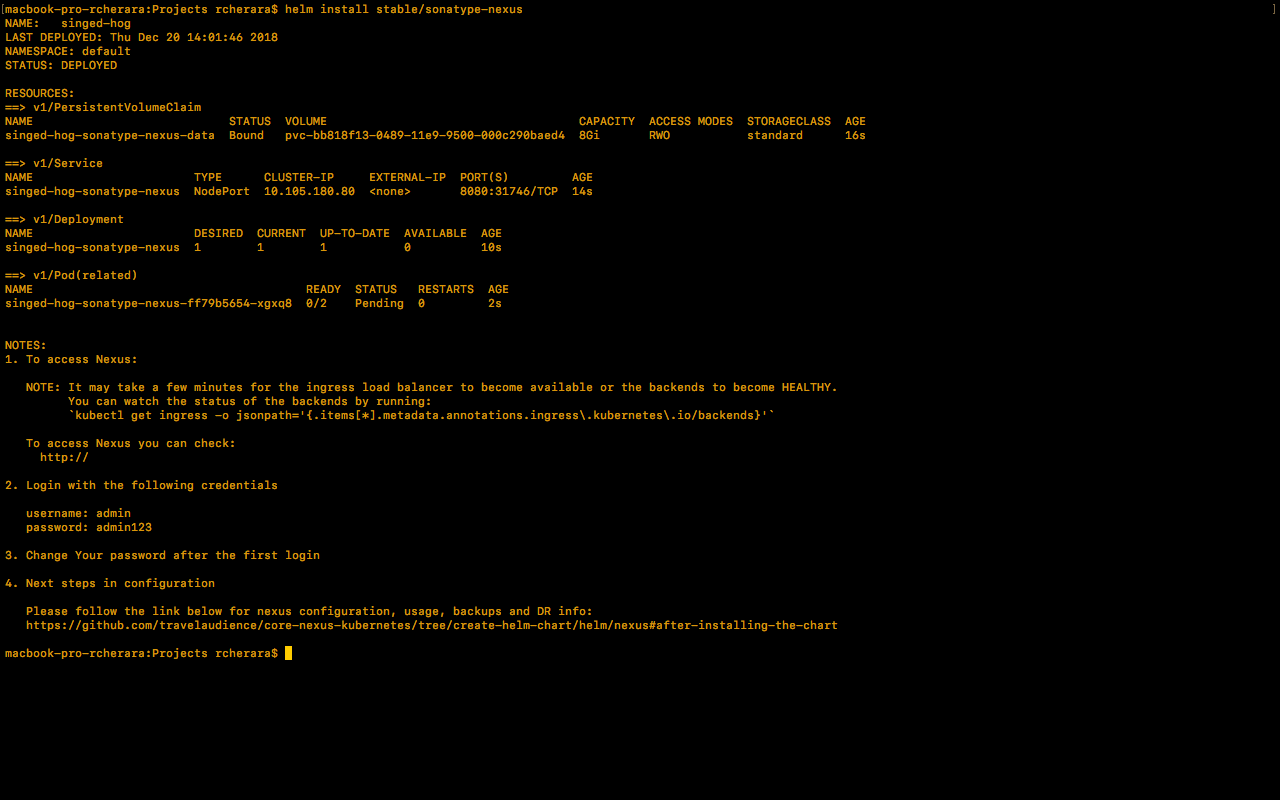
- sonatype-nexus
Let’s install the sonatype-nexus package, Helm display informations about the package installed.
$ helm install stable/sonatype-nexus
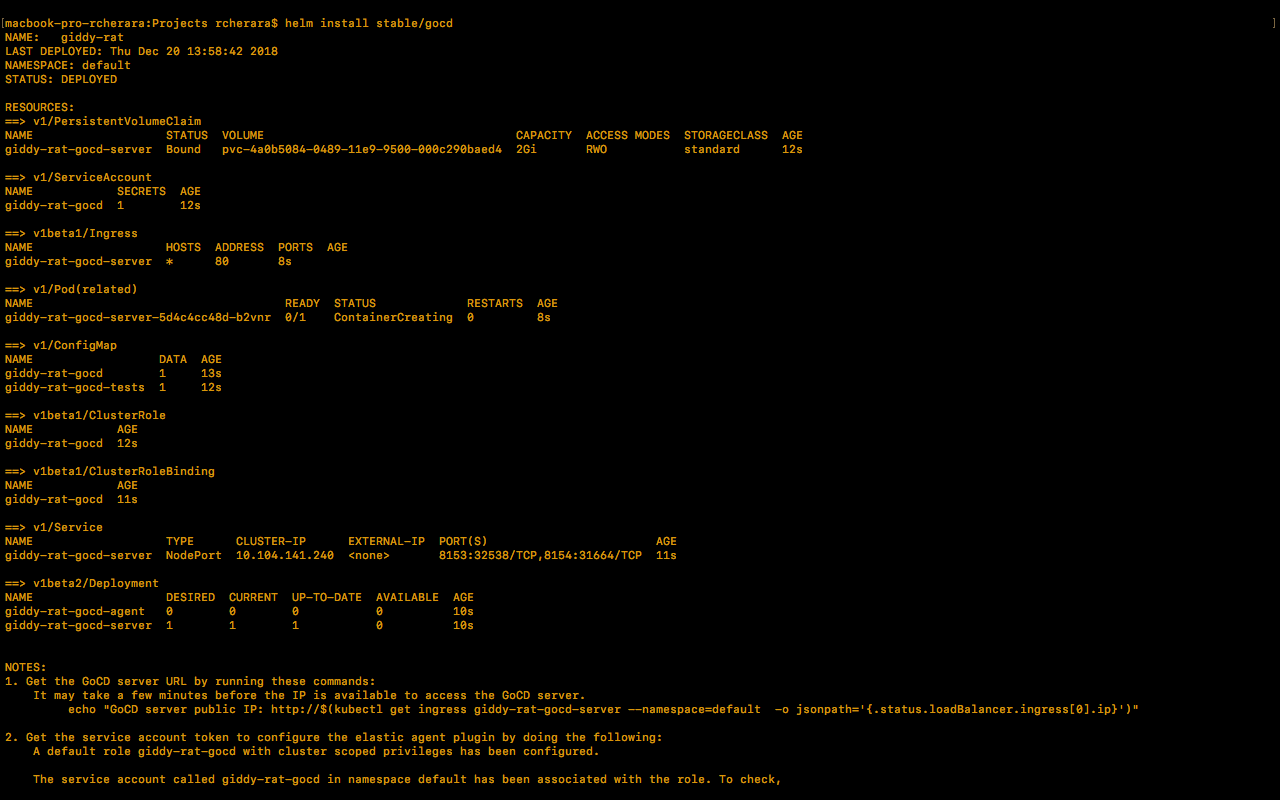
- gocd
Let’s install the gocd package, Helm display informations about the package installed.
$ helm install stable/gocd

Conclusion
Kubernetes is an amazing product and you can do a lot with it. With Helm, installing and managing applications in Kubernetes becomes as easy as using a package manager (apt or yum for example).
Have fun 🙂