A registry is a stateless, highly scalable, server-side application that stores and lets you distribute Docker images. At a high level, a registry is a collection of different repositories which contain our images. These images have different tags. We generally use a private registry when we want to -
- keep control of the distribution of images
- control where the images are stored
- integrate image storage and distribution tightly into your in-house development workflow
Prerequisites
I am using Ubuntu 18.04, so all commands will be related to this system.
Make sure that you have met the following prerequisites before continuing with this tutorial:
- You need to have Docker and Docker Compose installed on your host
- You need to have an installed nginx.
- Examples assume you have a domain:
rcherara.com, and that you want to start registry on:registry.rcherara.com
These article assume the following:
- Your registry URL is
https://registry.rcherara.com/. - Your DNS, routing, and firewall settings allow access to the registry’s host on port 443.
- You have already obtained a certificate from a certificate authority (CA).
The registry supports using Let’s Encrypt to automatically obtain a browser-trusted certificate. For more information on Let’s Encrypt, see https://letsencrypt.org/how-it-works/ or https://rcherara.ca/secure-nginx-with-lets-encrypt/ and the relevant section of the registry configuration.
To get the SSL Certificate, we can use openssl to create Self-Signed SSL or to use Let's Encrypt SSL
Create a self-signed certificate with OpenSSL
Create a Certificate Authority private key :
$ openssl req -new -newkey rsa:1024 -nodes -out ca.csr -keyout ca.key
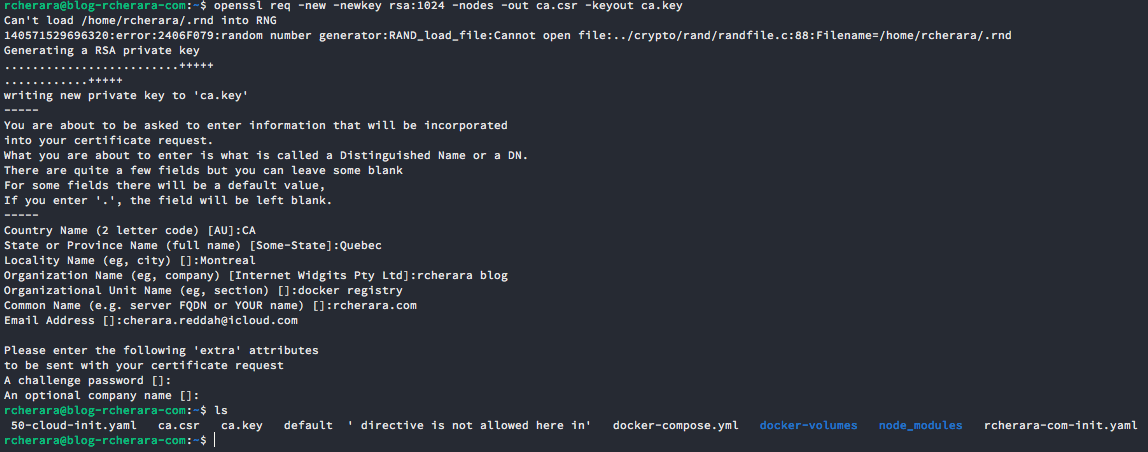
For your country code use : https://www.digicert.com/ssl-certificate-country-codes.htm
Create your CA self-signed certificate:
$ openssl x509 -trustout -signkey ca.key -days 365 -req -in ca.csr -out ca.pem

$ openssl x509 -trustout -signkey ca.key -days 365 -req -in ca.csr -out ca.pem

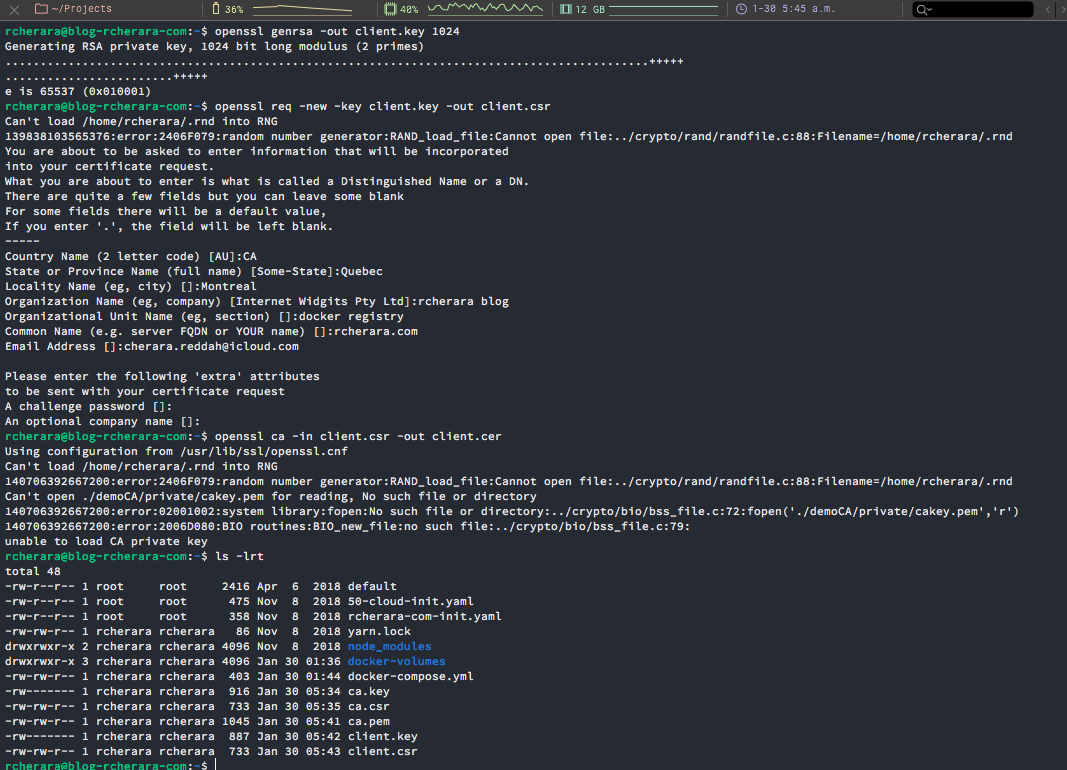
Issue a client certificate by first generating the key, then request (or use one provided by external system) then sign the certificate using private key of your CA:
$ openssl genrsa -out client.key 1024
$ openssl req -new -key client.key -out client.csr
$ openssl ca -in client.csr -out client.cer
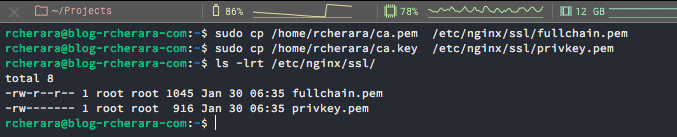
Copy SSL certificate files of your domain to the 'ssl' directory.
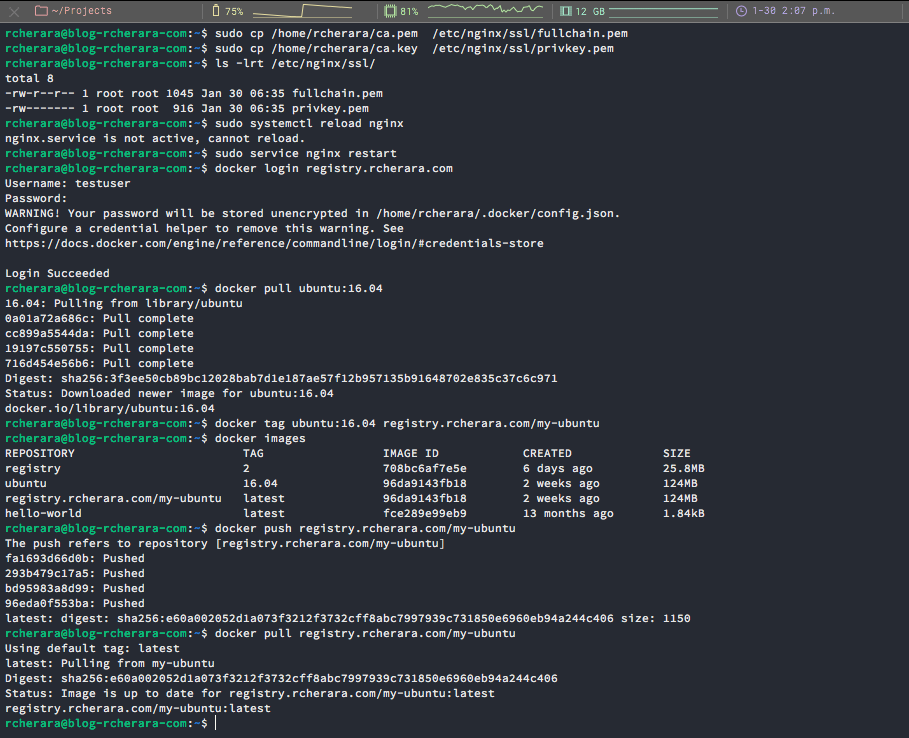
$ sudo cp /home/rcherara/ca.pem  /etc/nginx/ssl/fullchain.pem
$ sudo cp /home/rcherara/ca.key  /etc/nginx/ssl/privkey.pem
Let's Encrypt SSL
You can secure your Nginx with Let's Encrypt SSL as explained in my tutorial here :
 DevOps For Beginners
Deploy your registry using a Docker-Compose file
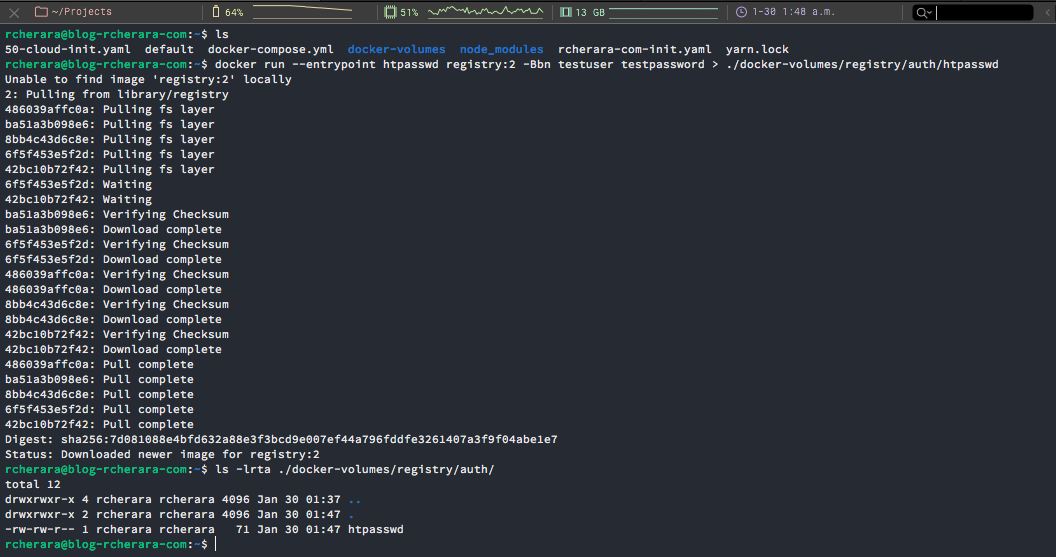
$ mkdir docker-volumes
$ mkdir docker-volumes/registry/
$ mkdir docker-volumes/registry/registry
$ mkdir docker-volumes/registry/auth

Use the following example docker-compose.yml as a template.
Create docker-compose.yml file:
version: "3"
services:
  registry:
    restart: always
    image: 'registry:2'
    ports:
      - "5000:5000"
    environment:
      REGISTRY_AUTH: htpasswd
      REGISTRY_AUTH_HTPASSWD_PATH: /auth/htpasswd
      REGISTRY_AUTH_HTPASSWD_REALM: Registry Realm
    volumes:
      - /home/rcherara/docker-volumes/registry/registry:/var/lib/registry
      - /home/rcherara/docker-volumes/registry/auth:/auth
In my case I have an certificate and I use this configuration
registry:
  restart: always
  image: registry:2
  ports:
    - 5000:5000
  environment:
    REGISTRY_HTTP_TLS_CERTIFICATE: /etc/nginx/ssl/fullchain.pem
    REGISTRY_HTTP_TLS_KEY: /etc/nginx/ssl/privkey.pem
    REGISTRY_AUTH: htpasswd
    REGISTRY_AUTH_HTPASSWD_PATH: /auth/htpasswd
    REGISTRY_AUTH_HTPASSWD_REALM: Registry Realm
  volumes:
    - /home/rcherara:/certs
    - /home/rcherara/docker-volumes/registry/registry:/var/lib/registry
    - /home/rcherara/docker-volumes/registry/auth:/auth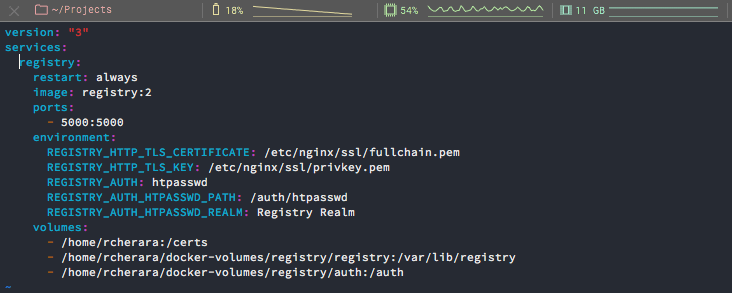
Now we can start your registry by issuing the following command in the directory containing the docker-compose.yml file:
$ docker-compose up -d

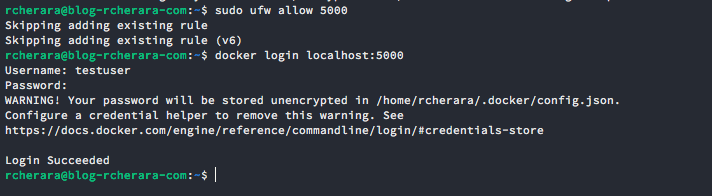
$ docker run --entrypoint htpasswd registry:2 -Bbn testuser testpassword > ./docker-volumes/registry/auth/htpasswd

$ docker login localhost:5000
Configure the domain registry.rcherara.com
$ sudo touch /etc/nginx/sites-available/registry.rcherara.com.conf
$ sudo vi /etc/nginx/sites-available/registry.rcherara.com.conf

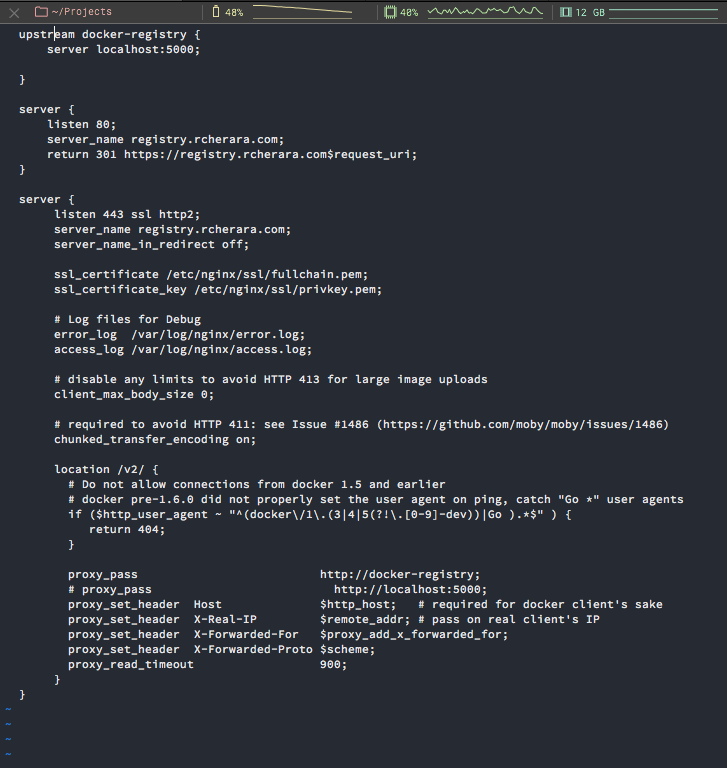
Paste the following configuration.
upstream docker-registry {
server registry:5000;
}

server {
listen 80;
server_name registry.rcherara.com;
return 301 https://registry.rcherara.com$request_uri;
}

server {
listen 443 ssl http2;
server_name registry.rcherara.com;

ssl_certificate /etc/nginx/ssl/fullchain.pem;
ssl_certificate_key /etc/nginx/ssl/privkey.pem;

# Log files for Debug
error_log  /var/log/nginx/error.log;
access_log /var/log/nginx/access.log;

location / {
    # Do not allow connections from docker 1.5 and earlier
    # docker pre-1.6.0 did not properly set the user agent on ping, catch "Go *" user agents
    if ($http_user_agent ~ "^(docker\/1\.(3|4|5(?!\.[0-9]-dev))|Go ).*$" )  {
        return 404;
    }

    proxy_pass                          http://docker-registry;
    proxy_set_header  Host              $http_host;
    proxy_set_header  X-Real-IP         $remote_addr;
    proxy_set_header  X-Forwarded-For   $proxy_add_x_forwarded_for;
    proxy_set_header  X-Forwarded-Proto $scheme;
    proxy_read_timeout                  900;
}

}
Save and close.
Validate the Configuration and Start Nginx
Validate the configuration file has no syntax errors. This is good practice, as a simple syntax error will prevent the Nginx service from starting, preventing visitors from accessing your site.
$ sudo nginx -t -c /etc/nginx/sites-available/registry.rcherara.com.conf

Provided no errors were found, enable the site. To do so we’ll need to create a symbolic link of the site configuration file in the sites-enabled directory.
$ sudo ln -s /etc/nginx/sites-available/registry.rcherara.com.conf /etc/nginx/sites-enabled/registry.rcherara.com.confStart or restart the Nginx service.
$ sudo systemctl start nginxIf Nginx is already running, reload all configuration files without stopping the service.
$ sudo systemctl reload nginxVerify that Nginx is running.
$ sudo systemctl status nginxAlso restart nginx so it loads new config for registry.rcherara.com.conf
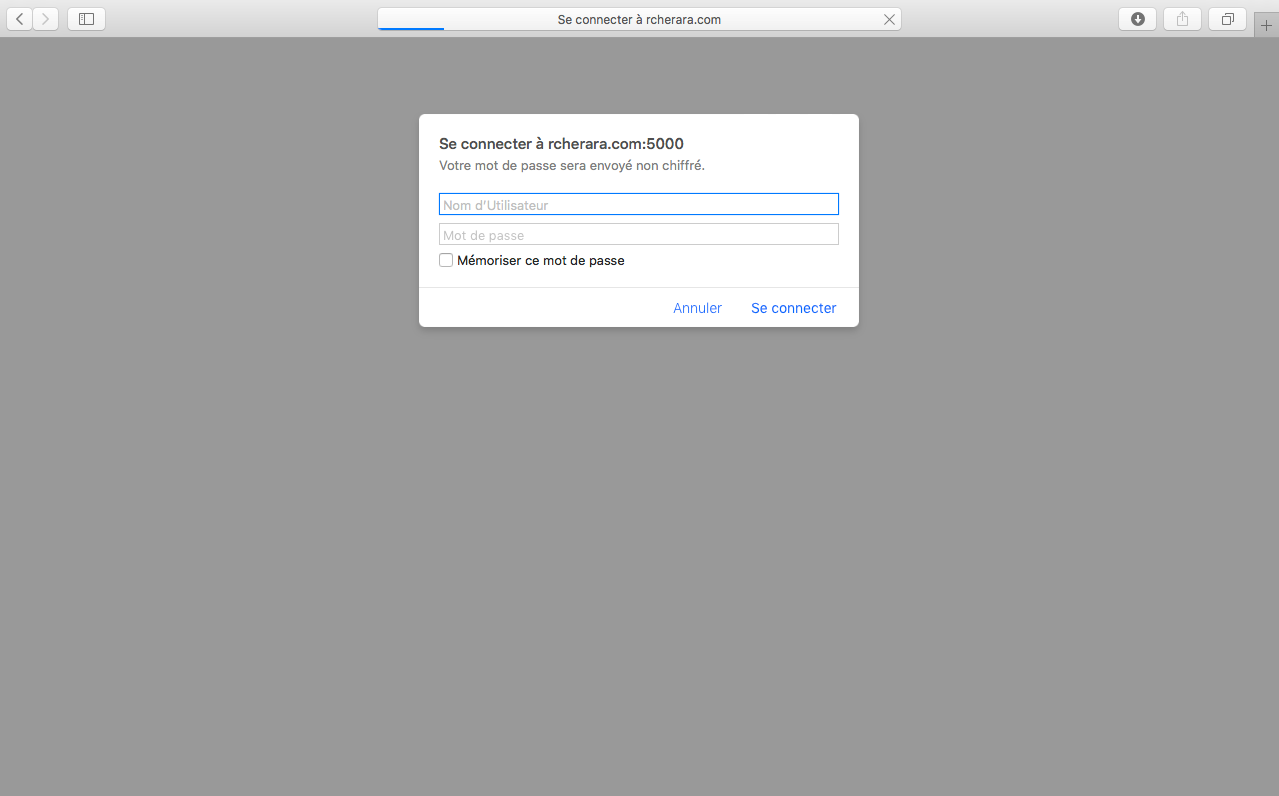
$ sudo service nginx restartIn order to check that we configured everything correctly, go to console on your local machine, which you would use to build images (your laptop probably), and try to login:
$ docker login registry.rcherara.com

username : testuser
password : testpassword
Docker clients can now pull from and push to your registry using its external address. The following commands demonstrate this:
$ docker pull ubuntu:16.04
$ docker tag ubuntu:16.04 registry.rcherara.com/my-ubuntu
$ docker push registry.rcherara.com/my-ubuntu
$ docker pull registry.rcherara.com/my-ubuntu

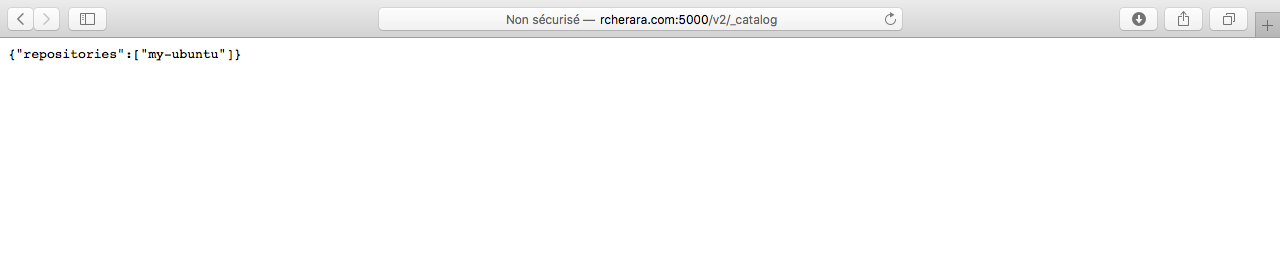
http://registry.rcherara.com:5000/v2/_catalog/
https://registry.rcherara.com/v2/_catalog/
Because we use BasicAuth to authenticate to registry we need to setup SSL so that our login/password is not taken by man in the middle attack.
Currently my nginx config support SSL which is required to make our registry accessible from outside.
Enjoy!