Nginx pronounced “engine x” is a free, open-source, high-performance HTTP and reverse proxy server responsible for handling the load of some of the largest sites on the Internet
Installing Nginx
$ sudo apt update
$ sudo apt install nginx
$ systemctl status nginx
Adjusting the Firewall
$ sudo ufw app listChecking your Web Server
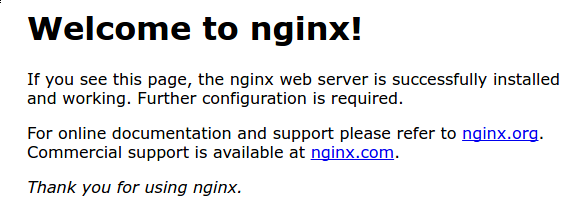
Access the default Nginx landing page to confirm that the software is running properly through your IP address:
http://your_server_ipYou should see the default Nginx landing page:
Setting Up Server Blocks
Create the directory for example.com, using the -p flag to create any necessary parent directories:
$ sudo mkdir -p /var/www/example.com/html
$ sudo chown -R $USER:$USER /var/www/example.com/html
$ sudo chmod -R 755 /var/www/example.com
Create a sample index.html page using nano or your favorite editor:
$ nano /var/www/example.com/html/index.html/var/www/example.com/html/index.html
<html>
<head>
    <title>Welcome to Example.com!</title>
</head>
<body>
    <h1>Success!  The example.com server block is working!</h1>
</body>
</html>
Make a new server block at /etc/nginx/sites-available/example.com:
$ sudo nano /etc/nginx/sites-available/example.comPaste in the following configuration block, updated for our new directory and domain name:
/etc/nginx/sites-available/example.com
server {
    listen 80;
    listen [::]:80;

    root /var/www/example.com/html;
    index index.html index.htm index.nginx-debian.html;

    server_name example.com www.example.com;

    location / {
            try_files $uri $uri/ =404;
    }
}
Enable the file by creating a link from it to the sites-enabled directory:
$ sudo ln -s /etc/nginx/sites-available/example.com /etc/nginx/sites-enabled/Two server blocks are now enabled and configured to respond to requests based on their listenand server_name directives:
example.com: Will respond to requests forexample.comandwww.example.com.default: Will respond to any requests on port80that do not match the other two blocks.
To avoid a possible hash bucket memory problem. Find the server_names_hash_bucket_size directive and remove the # symbol to uncomment the line:
/etc/nginx/nginx.conf
...
http {
    ...
    server_names_hash_bucket_size 64;
    ...
}
...
Test for syntax errors:
$ sudo nginx -tRestart Nginx to enable your changes:
$ sudo systemctl restart nginxNginx should now be serving your domain name. You can test this by navigating to http://example.com, where you should see something like this:

Starting Nginx
Just run the following command:
$ sudo systemctl start nginxIf you are running a Linux distribution without systemd to start Nginx type:
$ sudo service start nginxIt is recommended to set it to start on system boot:
$ sudo systemctl enable nginxStopping Nginx
To stop Nginx, run one of the following commands:
$ sudo systemctl stop nginx
$ sudo service stop nginx
Restarting Nginx
$ sudo systemctl restart nginx
$ sudo service restart nginx
Reloading Nginx
- Reloading keeps the server running while re-reading any configuration file updates.
- Reloading is safer than restarting because if a syntax error is noticed in a config file, it will not proceed with the reload and your server remains running.
- If there is a syntax error in a config file and you restart, it's possible the server will not restart correctly.
Testing Nginx Configuration
Use the following command to test the Nginx configuration for any syntax or system errors:
$ sudo nginx -tViewing Nginx Status
To check the status of the Nginx service, use the following command:
$ sudo systemctl status nginxChecking Nginx Version
You can check your Nginx version by running:
$ sudo nginx -vConclusion
If you want to learn more about the Nginx command line options, visit the Nginx documentation.