Amazon supplies comand-line tools that make it easy to work with their API-driven infrastructure. In this article we learn how to install the AWS Command Line Interface (CLI) tools. Amazon has detailed documentation that covers installation of their tools, but the basic steps are as follows.
Installing the AWS CLI on macOS :
If you don't know about Homebrew is an easy way to install Mac terminal utilities and graphical apps. It’s a bit like Chocolatey or OneGet on Windows, or the package managers included with Linux. It’s even a way to install many of the useful apps that aren’t in the Mac App Store.
You can install the AWS CLI using the following commands:
$ brew update
$ brew install awscli

On Windows.
Amazon provides a standard MSI installer for Windows, which can be downloaded from Amazon S3 for your architecture:
- Download the AWS CLI MSI installer for Windows (64-bit)
- Download the AWS CLI MSI installer for Windows (32-bit)
- Download the AWS CLI setup file (includes both the 32-bit and 64-bit MSI installers and will automatically install the correct version)
Note : The MSI installer for the AWS CLI does not work with Windows Server 2008 (version 6.0.6002). Use pip to install with this version of Windows.
Installing the AWS CLI with Yum (Yellowdog Updater, Modified).
$ sudo yum -y update          # Install the latest system updates.
$ sudo yum -y install aws-cli # Install the AWS CLI.
$ aws --version               # Confirm the AWS CLI was installed.
Installing the AWS CLI with Pip
The Amazon CLI tools are written in Python. So on most platforms, you can install the tools with the Python pip package manager by running the following from a shell:
$ pip install awscliSome platforms won’t have pip installed by default. In that case, you can use the easy_install package manager, like this:
$ easy_install awscliConfiguration
Quickly verify that your AWS CLI was installed with the following command:
$ aws --version

To quickly configure the AWS CLI tool, ensure that you have access to your AWS Access Key ID and AWS Secret Access Key, and then run the following. You will be prompted for your authentication information and some preferred defaults:
$ aws configure
    AWS Access Key ID [None]: EXAMPLEACESSKEYEXAMPLEACESSKEYEXAMPLEACE
    AWS Secret Access Key [None]: SecBlogKEy/1CAEAMPL4/ReCHEraRAKEY
    Default region name [None]: us-east-1
    Default output format [None]: json
Command Structure in the AWS Command Line Interface
aws <command> <subcommand> [options and parameters]
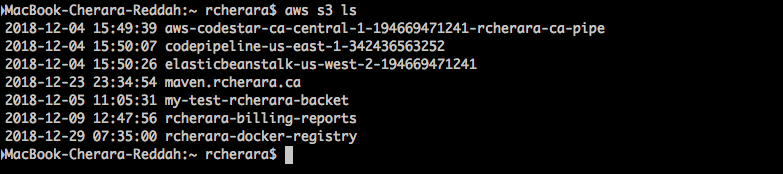
Finally, we can quickly test that the CLI tools are working correctly by running the following command to list the S3 bucket in your account:
$ aws s3 ls